
Have you ever caught yourself marveling at a dynamic TV slideshow, wondering with each transition what fascinating image would appear next?
Introduction
TV slideshows are common in various business settings, stores, and even homes. A TV slideshow can be a fun and engaging way to share memories, present information, or advertise. And you might be wondering how to create one yourself.
This guide will walk any beginner through the process of creating a TV slideshow. We will go through various methods, their benefits and limitations, along with some tips to get you started right away.
What is a TV Slideshow?
A TV slideshow is a series of images, videos, and/or text displayed sequentially on a digital screen or other display. These are commonly used in business presentations, educational content, or personal photo sharing, just to name a few applications. The key components of a TV slideshow include visually appealing images, engaging videos, concise text, and smooth transitions.
Can you play a photo slideshow on your home TV?
Absolutely, TVs today allow for much more than just watching your local channels and streaming content. That’s why we are examining here all the ways that you can animate your flatscreen with a slideshow, whether you want to showcase your latest vacation photo album, or playback your most memorable photos and videos while hosting a friends and family gathering.
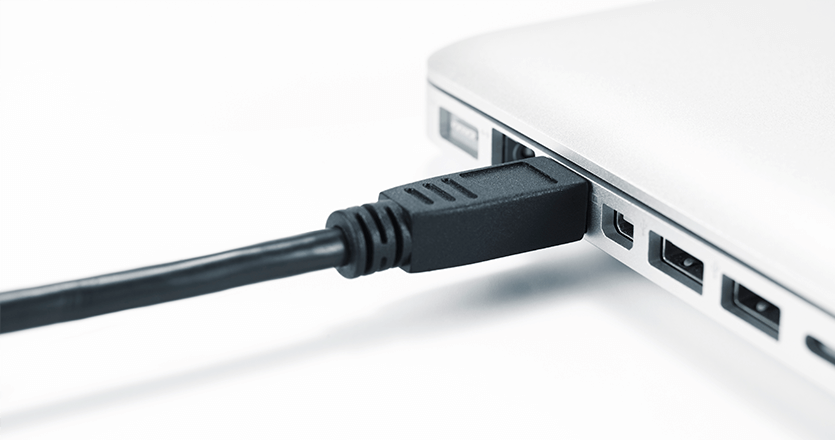
Using a USB flash drive
The simplest way to load a picture slideshow onto your television is with a USB flash drive. Most TVs nowadays have their own rudimentary media playback capabilities integrated into them.
Simple image and video formats
Here is how this method works for simple image and video formats such as JPEG, PNG, BMP for images and MP4, AVI, MKV, MOV for videos (please note that different TV models may support different files):
- First, manage the files you want on your slideshow on your flash drive with the help of your laptop or desktop computer.
- Safely eject and export the storage device so as to avoid corrupting files.
- Then plug the flash drive into a USB port of your TV screen.
- Use your remote to navigate to the native media player app of your TV and open the picture folder.
- Choose the slideshow playback option and you’re done!
PowerPoint and Google Slides presentations
If you wish to put a PowerPoint or Google Slides presentation in a TV slideshow, you can also do that with the help of a USB flash drive. With a slightly different method and preparation, you can easily turn a presentation into a slideshow and play it on your TV, which is particularly useful if you’re looking to transfer and loop a PowerPoint presentation on a TV.
If you choose to follow this approach, however, you need to add a few extra steps in the described guide above. You need to save and export your PowerPoint or Google Slides presentation in JPEG Interchangeable Format so that your screen can properly playback your media as it would do if they were regular image files.
*Bonus tip: You can follow our guides on using Google Slides for digital signage or using PowerPoint for digital signage to display and automatically update your slides on TV screens.
Benefits and limitations
While the USB flash drive method is pretty straightforward, allowing you to set up your TV slideshow easily and without having to invest in any extra software or hardware, it comes with some considerable limitations.
The inherent limitations of this approach is that it does not allow for easy management of your content. Changing and updating the content of your slideshow is a real hassle, as the flash drive needs to be disconnected from the TV, then plugged back into a computer for editing content, and then plugged back into the TV again. Not the most convenient approach if your content needs to be regularly updated, fine-tuned, or remotely managed.
Another limiting factor is the lack of advanced playback features. With a USB stick and a TV, you are limited to the playback features available on your devices. This means that timing the slideshow transitions, scheduling different content for different times of the day or adding extra features for interactivity are out of the question.
Plugging your laptop into your TV
This is probably the easiest process for creating a TV slideshow. Here is what this looks like in a few easy steps:
- First, collect the images and videos you want to showcase in a single folder.
- Connect your laptop to your TV screen with an HDMI cable.
- Then use your remote to navigate to the external channel corresponding to the port where you have plugged in your laptop.
- Choose whether you want to duplicate or extend your screen to your connected TV.
- Launch your slideshow on your laptop by opening a playback app that has a slideshow feature (depending on the app you are using you might be able to fine-tune timing and transitions).
- Put it on full screen and enjoy!
You simply have to set up your slideshow on your laptop with your preferred slideshow playback app and then connect your device with an HDMI cable into your TV.
In essence, this method utilizes your TV as a second screen for your laptop, either through duplication or expansion. This way you can control and manage your content directly through your laptop and see the changes appearing on your screen in real time. A tad easier solution than the USB flash drive.
The obvious limitation here is that you need to have a dedicated laptop connected to your screen at all times. This may be okay for a one-time home use at a family gathering, but it won’t serve you well for a more advanced and permanent solution.

Built-in smart TV applications
Utilizing the built-in applications of your smart TV is another easy way to create a TV slideshow. Many smart TVs allow you to play a slideshow directly using built-in apps or ones you can download. Most importantly, this method bypasses the need for either USB flash drives or laptops.
Smart TVs have brought a new revolution to how we interact with screens. Many smart TVs allow you to play a slideshow directly using built-in apps or ones you can download. This method is convenient if you’re wondering how to play a slideshow on TV without a computer or how to play a slideshow on TV with USB.
Utilizing the built-in apps of your TV
For those with an Apple TV, showcasing a photo slideshow is a straightforward process. You can access your iCloud account directly on the device. Simply activate the app and let your photos display in a seamless slideshow.
This ease of use extends to other cloud services like Google Photos as well. TVs equipped with Google TV technology offer a direct connection to your Google Drive and Google Photos accounts.
Launch the app, and you’re ready to start your slideshow.
Remember, this method works best if your photo collection is stored in cloud-based services.
Digital signage solutions
Digital signage has transformed how businesses, organizations, and even homes share information visually. By leveraging advanced technology, you can create dynamic TV slideshows that captivate your audience, whether you’re showcasing products, sharing family photos, or presenting business data. Here’s a detailed guide to help you understand and implement effective digital signage solutions for your needs.
Why Digital Signage?
Digital signage offers unparalleled flexibility and control over your content. Unlike traditional methods, it allows for real-time updates, scheduling, and remote management. This makes it an ideal solution for various settings such as retail stores, corporate offices, educational institutions, and more.
Creating TV slideshows with digital signage
To create an engaging TV slideshow using digital signage, follow these steps:
- Choose the right software: Select a digital signage platform that supports TV slideshows. Yodeck, for example, offers robust features for creating and managing slideshows. Look for software that provides cloud-based management, easy content updates, and scheduling capabilities.
- Prepare your content: Gather the images, videos, and text you want to include in your slideshow. Ensure that your content is high-quality and optimized for display on large screens. Use visually appealing images, concise text, and engaging videos to keep your audience interested.
- Utilize slideshow apps: Many digital signage platforms come with built-in slideshow apps. These apps simplify the process of creating slideshows by allowing you to source images directly from the web or cloud storage services like Google Photos or iCloud. This eliminates the need for manual file management and ensures that your content is always up-to-date.
- Customize your slideshow: Take advantage of the customization options available in your digital signage software. You can adjust the timing of transitions, add animations, and schedule different content to display at specific times. This level of control ensures that your slideshow is not only visually appealing but also contextually relevant.
- Deploy and manage: Once your slideshow is ready, deploy it to your digital signage displays. With cloud-based management, you can update your content remotely and in real-time. This is particularly useful for businesses that need to frequently change their promotional materials or information displays.
Slideshow apps
The Online Slideshow app is another great tool in the Yodeck app drawer for creating TV slideshows. The app allows you to source images from the web without having to manage files on your computer or in your Yodeck dashboard. Have a look at how easy it is to set up the online slideshow app in the video below.
Applications of Digital Signage TV Slideshows: Digital signage TV slideshows can be utilized in various scenarios, including:
- Retail displays: Showcase products, promotions, and special offers to attract customers and increase sales. This targeted messaging approach is often referred to as narrowcasting, where content is tailored for a specific audience.
- Corporate communications: Display company announcements, employee recognition, and important updates in common areas like lobbies and break rooms.
- Educational institutions: Share information about events, schedules, and achievements on campus.
- Healthcare facilities: Provide informative content in waiting rooms to engage and educate patients.
- Hospitality: Welcome guests with personalized messages and showcase amenities in hotels and resorts.
Benefits and considerations
While digital signage offers numerous advantages, it’s important to consider the initial setup cost and the need for a stable internet connection for cloud-based management. However, the long-term benefits of flexibility, ease of use, and the ability to deliver dynamic content make it a worthwhile investment in the longer term, and with Yodeck, you can certainly start for free!
Conclusion
TV slideshows present versatile, dynamic ways to engage audiences, whether in business, educational, or personal settings. By understanding the various methods—such as using USB flash drives, connecting laptops, or leveraging built-in smart TV applications—you can tailor your approach to fit your specific needs. For the most advanced and flexible solution, digital signage platforms offer unmatched capabilities in managing and updating content remotely and in real time. Embrace these technologies to transform your visual communication, ensuring your content is always captivating and relevant.
Ideas for TV slideshows
There are several situations where you may want to play a looping slideshow on a TV, including:
- Family gatherings: You may want to play a looping slideshow of family photos during holiday gatherings, birthdays, or other events to share memories with loved ones.
- Business presentations: In a business setting, a looping slideshow can be a useful tool for showcasing products, services, or company information to potential clients or investors.
- Trade shows: At trade shows or conferences, a looping slideshow can be a great way to draw attention to your booth and highlight your products or services.
- Waiting rooms: In waiting rooms such as doctor’s offices or lobbies, a looping slideshow can provide entertainment or information for visitors while they wait.
- Retail displays: In a retail setting, a looping slideshow can showcase products and promotions, providing customers with additional information and incentives to make purchases.
- Museums or galleries: In a museum or gallery setting, a looping slideshow can be used to display images of artwork, artifacts, or historical photos.
- Weddings: At weddings, a looping slideshow can be used to display photos of the couple and their families, providing a personalized touch to the event.