Want more flexibility and customization when creating your digital signage content?
We made it happen with our brand-new image background removal feature! So that you can deliver your message exactly the way you want it. Also, check out all the minor tweaks to our Layout Editor that together pack a whole lot of power!
A Little Image Background Removal Magic

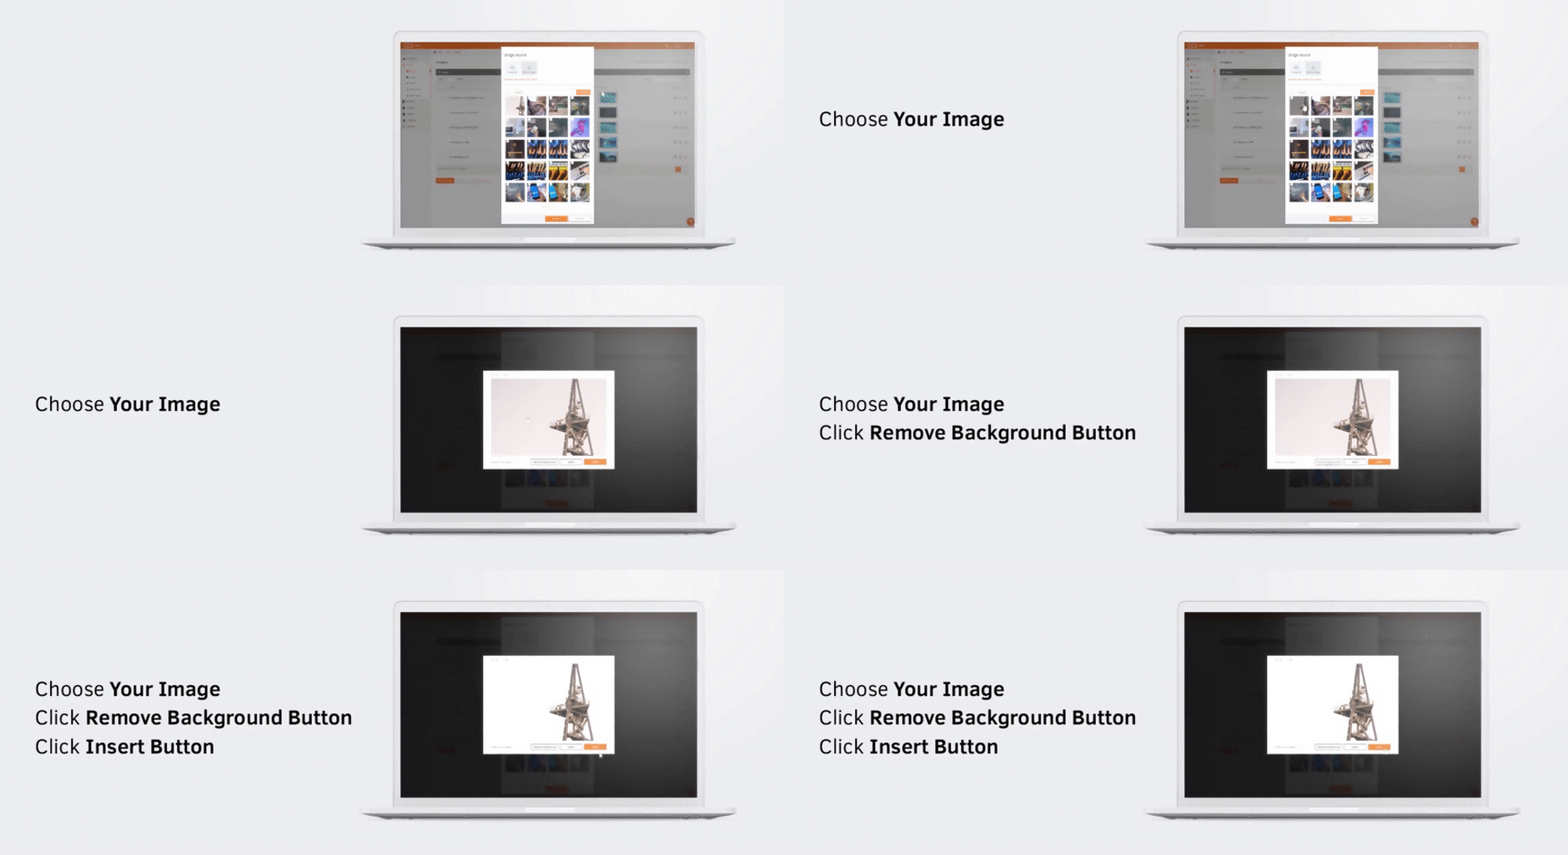
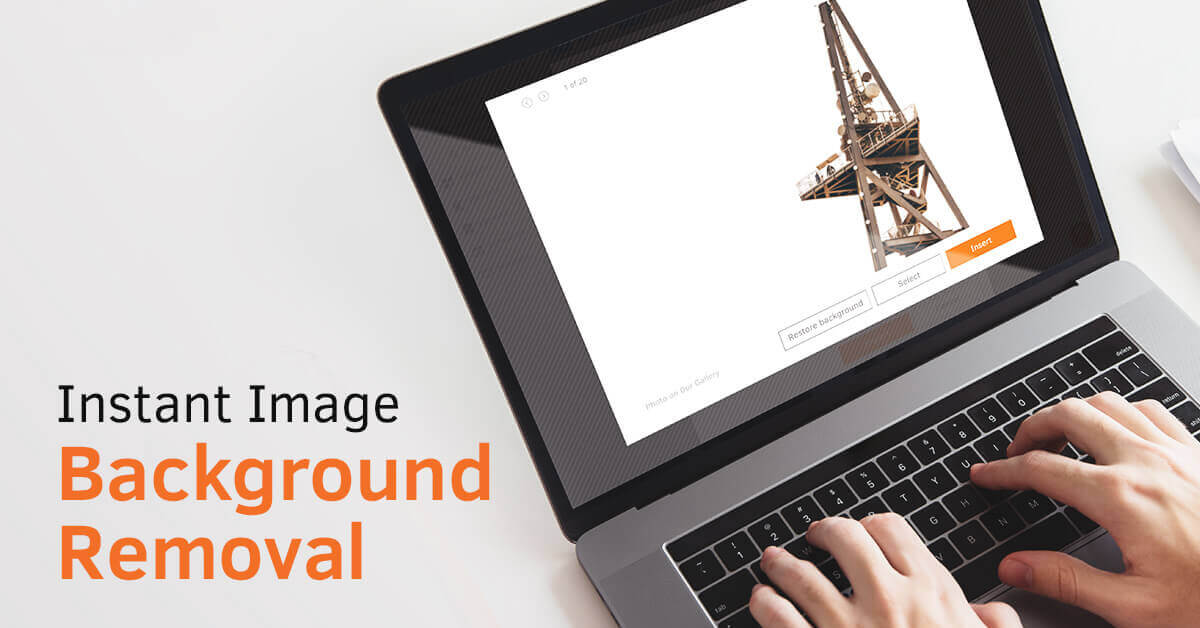
Have you ever found the perfect image for your content but wished you could get rid of the background? Sometimes you just want to use the foreground in order to create a great screen layout, playlist or default content. Now that’s totally doable with the click of a button using the Image Background Removal option. Additionally, it works great with both stock images and your own photos!
Just click on the image you want to tinker with when you’re in editing mode, and you’ll see the ‘Remove background’ button. We think you’ll find this feature especially useful when creating digital signage menu boards!
Superpowers for the Screen Layout Editor
Everyone loves displaying impressive screen layouts because they grab viewers’ attention quickly. No one loves spending tons of time creating them. That’s why we made a handful of little changes to the Layout Editor that will make your job a whole lot easier.
Firstly, when you want to add a media file, you’ll immediately see your files and Workspaces from inside the Layout Editor. Secondly, you can add stock images and videos right in the Editor, without needing to go back to the individual Media tabs. It will make adding media to your layouts quicker, easier, and more streamlined!
Release Notes
New feature
- Users can now remove the background from images with just one click. Simply go to the ‘Edit’ option for that image and click on the ‘Remove background’ button and then save your changes. It’s a useful option when you want to create menu boards but want to use only the main image in your screen layout.
Improvements
- We changed the Portal user interface to make it more user-friendly and aesthetically sleeker. If you want to add a new image or video, you’ll find two buttons that let you choose whether you want to upload the media file from your computer or import it from a URL.
- Additionally, we improved the functionality of the Layout Editor! As of now, when you add an image, video or any other media file from inside the Layout Editor, you will be taken to your files immediately and shown your Workspaces. It’s a quicker and more user friendly way of adding media to your screen layouts! Also, you can use stock content (images and videos) in your layouts from inside the Layout Editor. It takes you to the stock images and videos immediately without having to go back and forth to other tabs. Furthermore, we now introduced lazy-loading to Layouts. When you want to view your layouts, the Portal slowly brings up your layouts so you don’t have to wait for all of them to load.
- We also improved the way the Player sends screenshots to your account so it doesn’t use a lot of bandwidth and take resources from the Player.
- When you create an RSS App, you can now use the toggle button and remove images from posts so you only see text.
- The Calendar Event field now has more formats, including a MM/DD/YY format.
- We changed the Account Setting design, so that everything is now organized by category.
Bugs fixed
- If you use Firefox and MacOS, you can now edit within the Layout Editor without any glitches.
- We fixed a bug where users who had custom permissions to create, edit and delete schedules couldn’t go back and edit a schedule as the ‘Save’ button disappeared. You can now save after editing!
- When a user had all access permissions, they couldn’t create a custom layout. We fixed the glitch and it works perfectly now.
- When you selected a media as the default content for a Player, the fit option stayed on ‘Fit’ even if you chose ‘Crop’ or ‘Stretch’. You can now select and apply these options for your default content.
