Table of Contents
Introduction

Easily use the WiFi wizard in Yodeck digital signage to connect your Yodeck player to your wireless network.
How-to Video
First things first
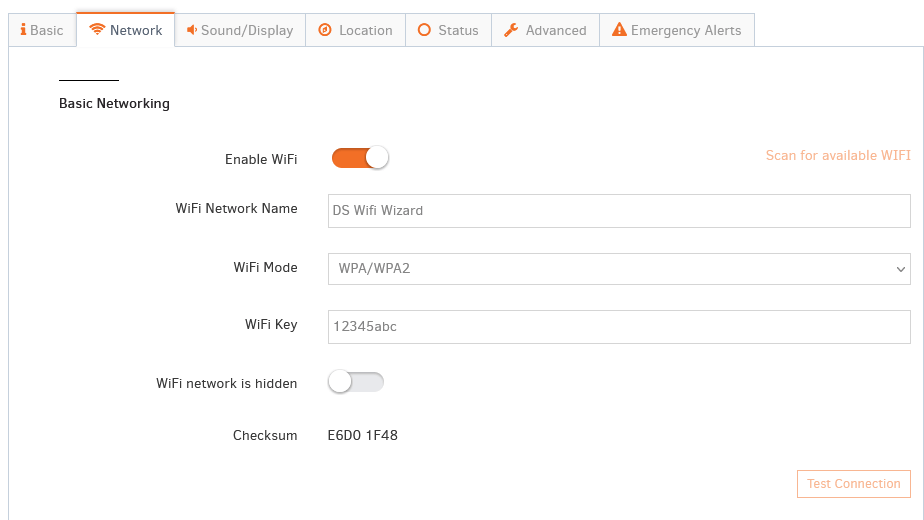
You must first type the relative WiFi credentials from the network you want to pair the Yodeck player.
- Click the player’s name and go to the Network tab.
- Toggle to ON the “Enable WiFi” option and type the credentials in the corresponding fields.
- After typing, click the “Save” button at the end of the form.
💡If you use a simple network (SSID/Password) as a WiFi mode, please use the WPA/WPA2 option.

Step-by-step procedure
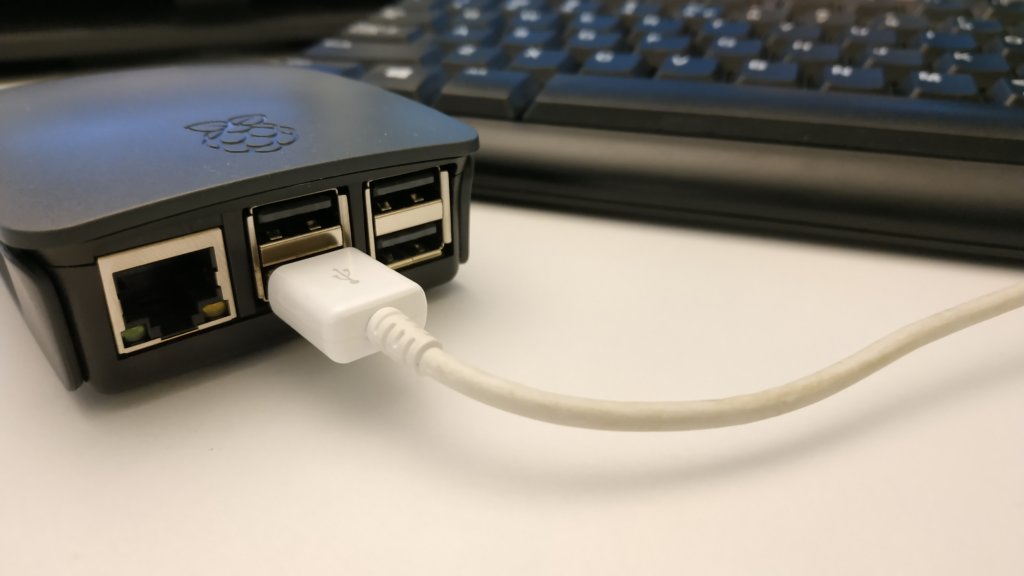
- Plug a USB keyboard into any player’s 4 USB ports and hit Ctrl+Alt+F12 simultaneously.
- ⚠️ Please don’t use wireless or MAC keyboards, as they won’t work correctly.
- ⚠️ To initiate the WiFi wizard for the Raspberry Pi 5, you will need to hit CTRL+ALT+F10 instead.
- 💡 Any USB port on the player will work.
- Wait for 4-6 seconds, and a new screen will appear.

What password do I need to type now?
- Login to your Yodeck account.
- Click the player’s name and navigate to the Advanced ->Security tab.
- Find the password in the Remote Support Password field. It will be an 8-digit password.
- Type that password using the keyboard and press the Enter key.
- 💡Respect capital letters as well. The password is case-sensitive!

Using the WiFi Wizard
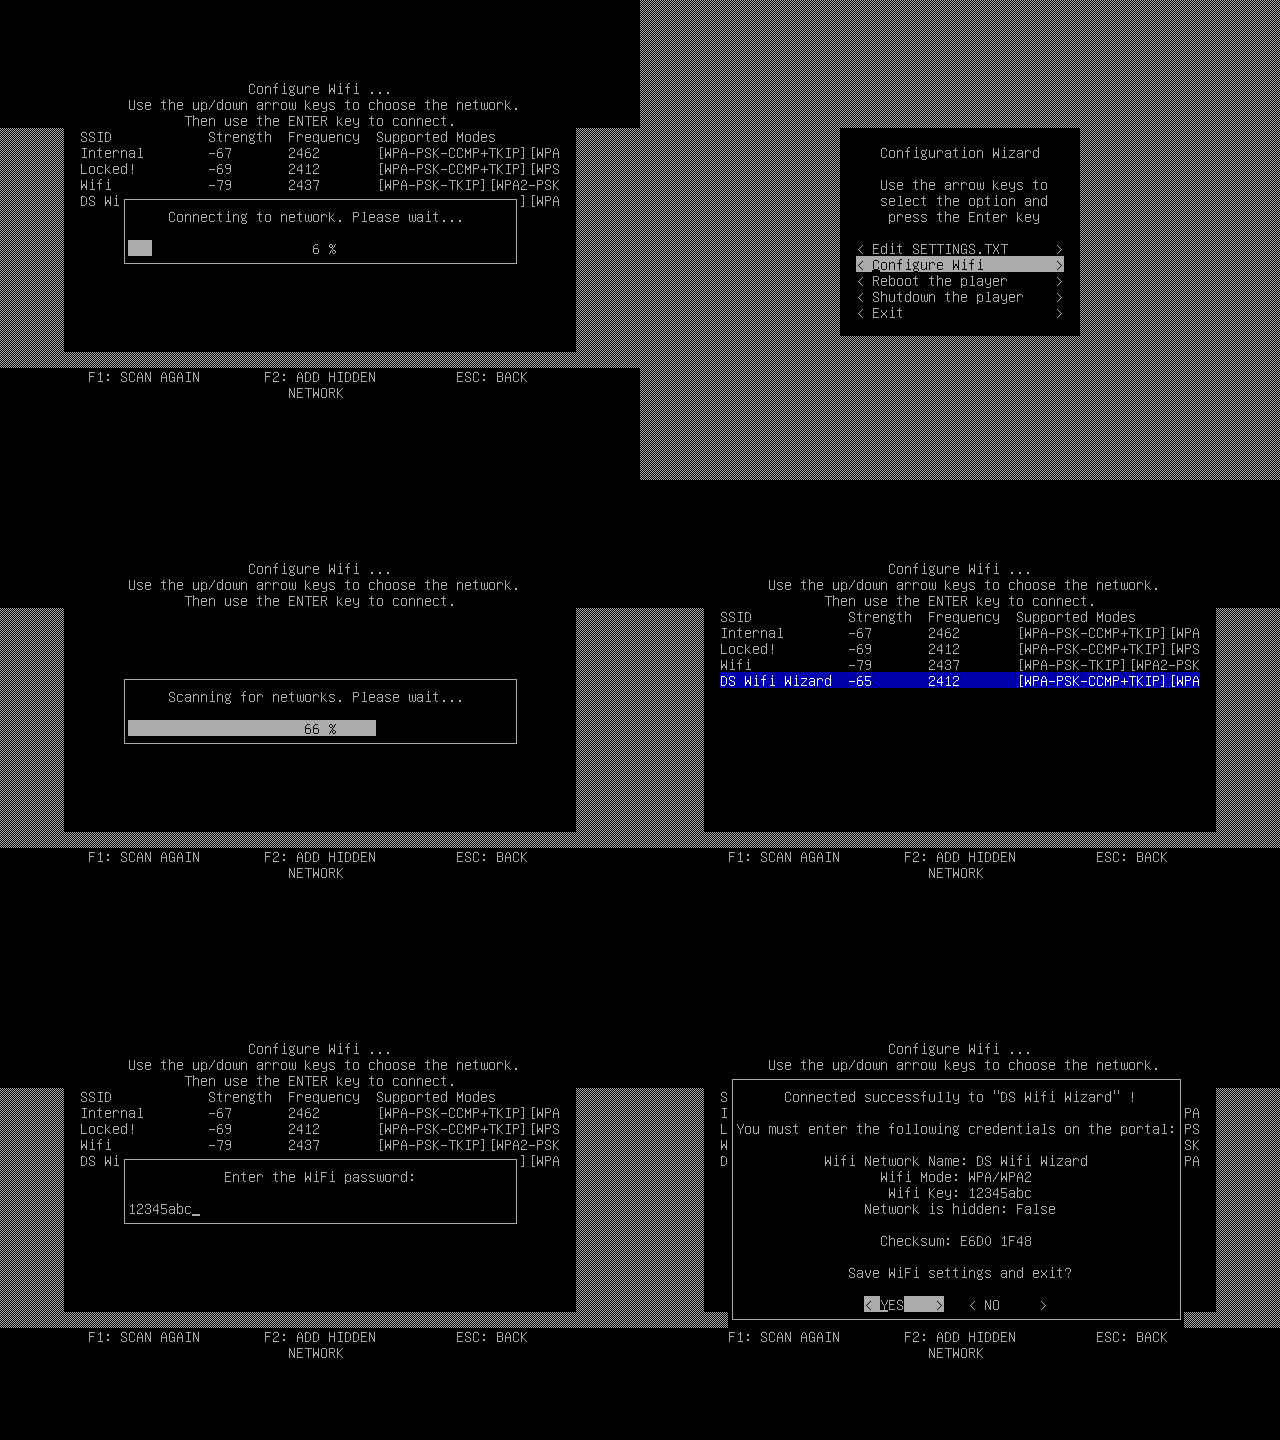
Once you connect to your player with the above credentials, the player will search nearby WiFi networks automatically.
- Choose the WiFi network of your choice and press the Enter key.
- 💡You can also configure an Enterprise WiFi network (EAP).
- Type the WiFi password and press the Enter key.
- 💡The password is case-sensitive.
- The player will attempt to connect to that Wireless network.
- 💡If the WiFi credentials are correct, the player should connect without issues.
- By clicking the “Yes” option, the player will Save the WiFi settings and apply the new configuration.
- 💡You will notice a blinking message “Configuring.” Do not reboot the player at this state. The player is applying the new configuration.

Need Help?
The Yodeck Support Team can help you out! Log in to your Yodeck account and Send us a message from the bottom right corner!
FAQ
My password is in this form: “••••••”. What do I need to type now?

You can find the Remote Support password in your player’s advanced settings in the Security tab. The password is hashed for security reasons if the password is in this form “••••••“. You must type the not-hashed password you have set in the past. If you do not remember the Remote Support password you have set in the past, you will need an Ethernet cable to bring the player back Online.
How do I change the Remote Support Password?
The player needs to be online to make this change. If you do not remember the password you have set, re-type a new password and click “Save.” You will notice a ‘Configuring’ message at the bottom of your screen. After that message disappears, try to initiate the WiFi Wizard again and type the password you have set.
How do I add a hidden WiFi network?
After logging into the wizard, if the wireless network is hidden, it won’t appear after a scan. You can press F2 on your keyboard and add the hidden network manually.
I cannot see the WiFi network in the scanning list
- The player is not able to reach the specific wireless network. Move the player or the router/access point closer to each other.
- The specific WiFi network is hidden.