Table of Contents
Comprehensive Guide for ChromeOS Enrollment with Yodeck Player
This article will guide you through enrolling your ChromeOS device and setting up Yodeck Digital Signage Players using Chrome Enterprise management. Follow the steps below to ensure a smooth process.
Prerequisites: Google Enterprise Single App Kiosk Licenses
Before you begin, you must have Google Enterprise Single App Kiosk Licenses. Chrome Enterprise is Google’s management system, allowing you to manage multiple Chrome devices from a single interface.
To purchase Chrome Enterprise licenses, click here for more information.
Steps to Enroll Your ChromeOS Digital Signage Players
Access Google Enterprise Enrollment
- Begin by enrolling your ChromeOS devices in Google Enterprise.
- Follow these Google Enterprise instructions to enroll your devices.
Set Yodeck Player as the Default Application
Once your devices are enrolled, you must set up the Yodeck WebPlayer as the default app.
- On the left-side panel, click on Devices.
- Navigate to ChromeOS Devices.
- Select the Apps & Extensions menu.
- Click on the Kiosks tab.
- Press the “+” button at the bottom right of the screen.
- Press the first of the three buttons to add the PWA (Progressive Web App) version of the Yodeck WebPlayer.
- Paste the WebPlayer URL:
https://player.yodeck.com/?chromeos - Set the WebPlayer as the Auto-launch app to ensure it automatically starts when the device boots up.
Install the Yodeck extension
Click on “Web Player” and scroll down on the right panel until you find the “ADD EXTENSION” button.
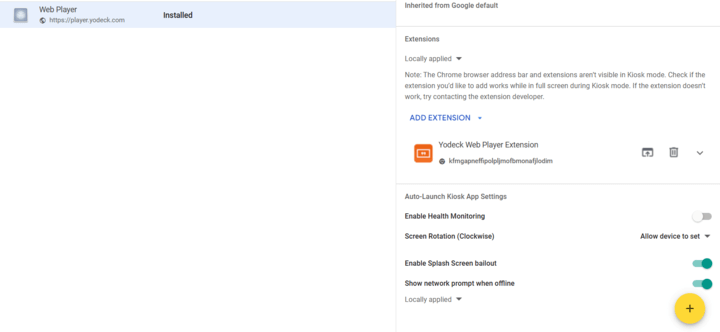
Click the button and then select the “Add from Chrome Web Store” or “Add from a custom URL” button.
Add from Chrome Web Store
- Select Add from Chrome Web Store, then find and click the Yodeck Web Player extension.
- Click Select. The name and ID of the extension appear in the side panel under Extensions.
- Click Save and just set the Yodeck extension on your ChromeOS.
Add from a custom URL
- A pop-up will appear and will require the extension ID, which you will need to paste:
- kfmgapneffipolpljmofbmonafjlodim
- Click “CONFIRM” and just set the Yodeck extension on your ChromeOS.

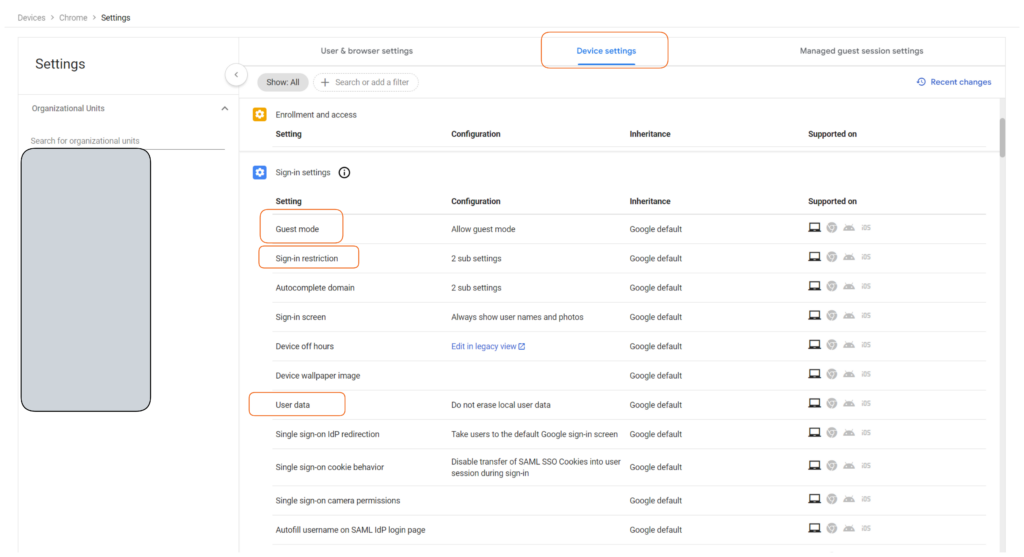
Configure Device Settings for Optimal Performance
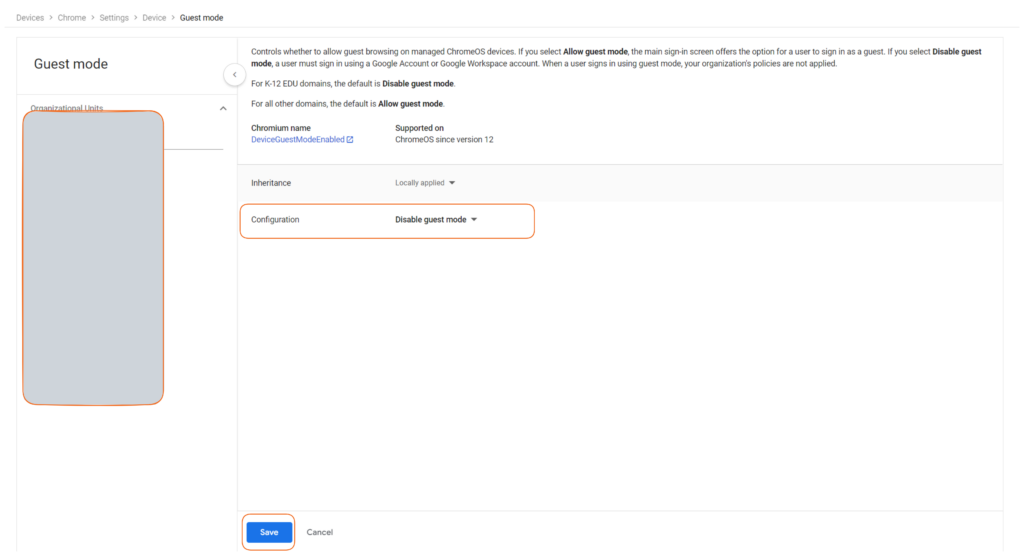
Set Guest Mode and User Restrictions
- Go to Devices → Chrome → Settings.
- Click on the Device Settings tab.
- Configure the following options:
- Guest Mode: Set to “Disable guest mode”.
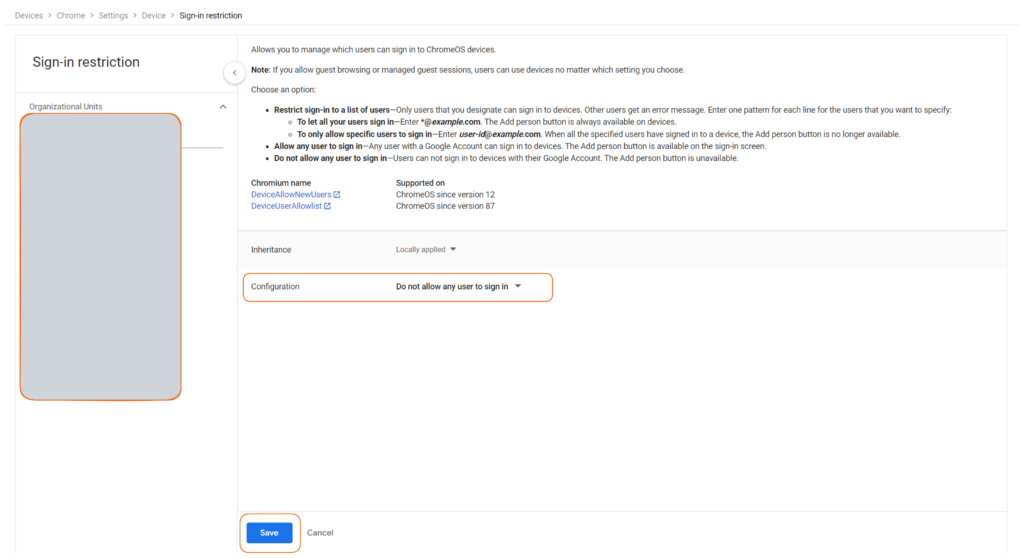
- Sign-in Restriction: Set to “Do not allow any user to sign in”.
- User Data: Set to “Do not erase local user data”.
Disable Managed Guest Sessions
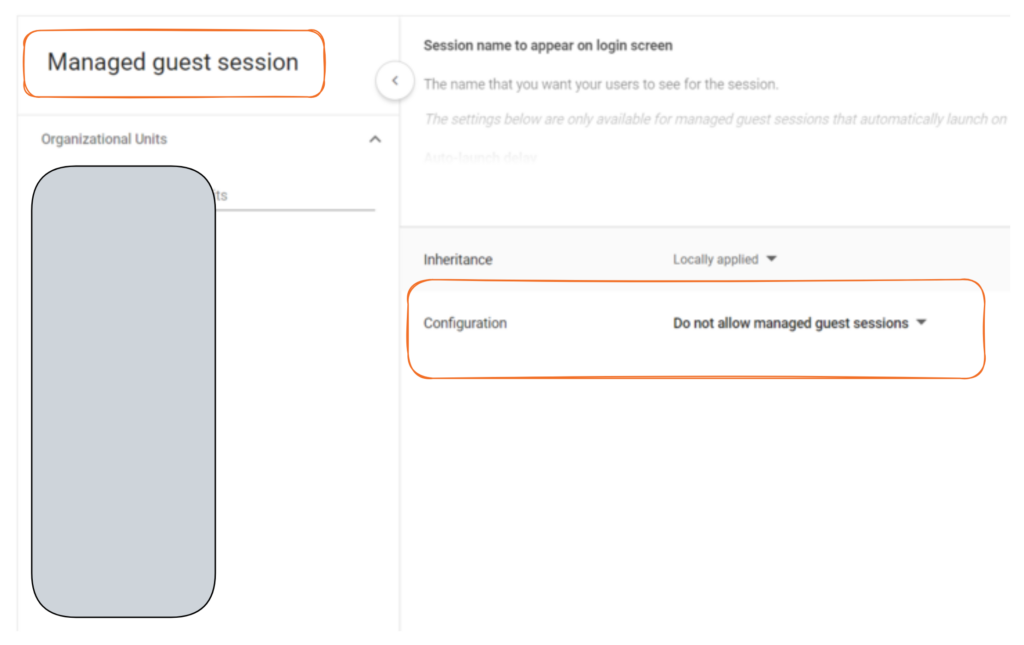
- Click on the Managed Guest Session Settings tab.
- Set the Managed Guest Session option to “Do not allow managed guest sessions”.
Set up the power settings of the device
- Go to “Settings” from the left side panel
- Click on “Device settings”
- Scroll to “Kiosk power settings”
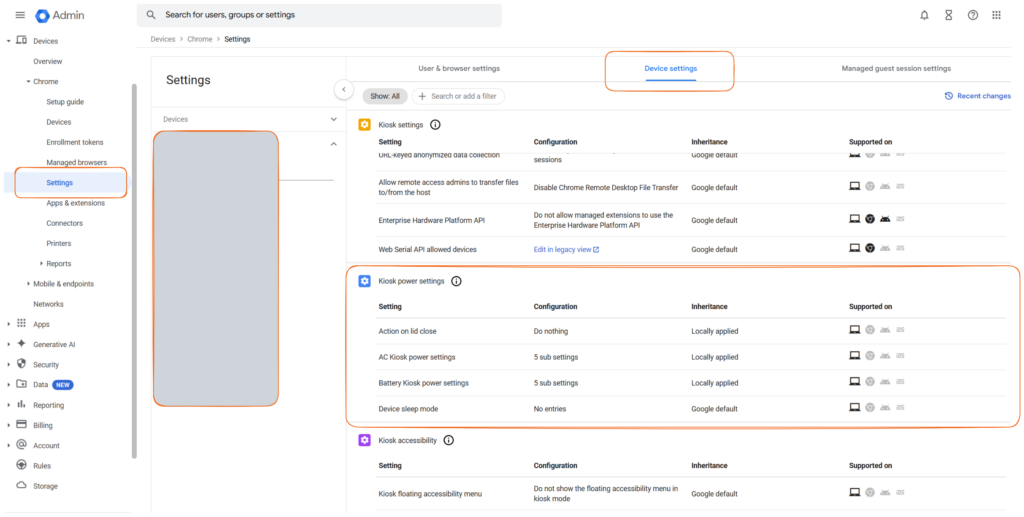
Open each one of these settings except for “Device sleep mode” and set all the Idle timeouts to 0 (zero) and all actions to “Do nothing”
Note: The first field of “AC Kiosk power settings” and “Battery Kiosk power settings” can not take 0 as a value, but as the information below them says, you just need to set the “Action on idle” to “Do Nothing.”
Register Your Yodeck Player
After creating a Player, you must register it under your Yodeck Account.
- Log in to your Yodeck Account and go to the “Screens” section.
- 💡If you do not have a Yodeck account, create one for free.
- Create a new Screen entry by clicking the “+Add Screen” button.
- A new window will appear. You have two options for registration:
- 1. Follow the registration flow and select the ChromeOS Player option. After that, you can fill in the registration code.
- 2. Alternatively, you can close the pop-up window and directly enter the 9-digit registration code displayed on your TV screen in the “Registration Code” field.
In both cases, the registration process will use the provided code to complete your registration, helping to minimize user errors and guesswork for new users.
ℹ️For more information, please check the New Screen Registration article.
- To finish the registration, click the “Save” button.
- After a minute, your player should register with your Yodeck Account, and the assigned content should start showing on the screen.
ChromeOS Limitations
Check out the current limitations of the ChromeOS Player.
Need Help?
The Yodeck Support Team can help you out! Log in to your Yodeck account and send us a message from the bottom right corner!