Upload a Web Page
You can showcase web pages as digital signs using Yodeck.
This is an excellent way to draw attention to your business website or any other sites of interest to your customers or teams.
- Navigate to the ‘Media‘ tab and then choose ‘Web Pages‘.
- Click ‘Add a new web page’.
- Provide a ‘Name‘ and an optional ‘Description‘ for the page.
- Copy and paste the web page URL into the ‘Web Page‘ box.
- You can then add tags to this web page if you want to use this feature.
- You also have the option to set the default duration for how long the web page will be displayed in a playlist if it is included. This setting can be modified from within the playlist as well.
At this point, you have the option to customize the advanced settings according to your preferences, or you can choose to leave them as they are.
- Specify an optional expiration date if you want to restrict the display of the web page to a specific time frame. Alternatively, if you wish to display the page continually, ensure that both ‘Always‘ and ‘Forever‘ options are selected.
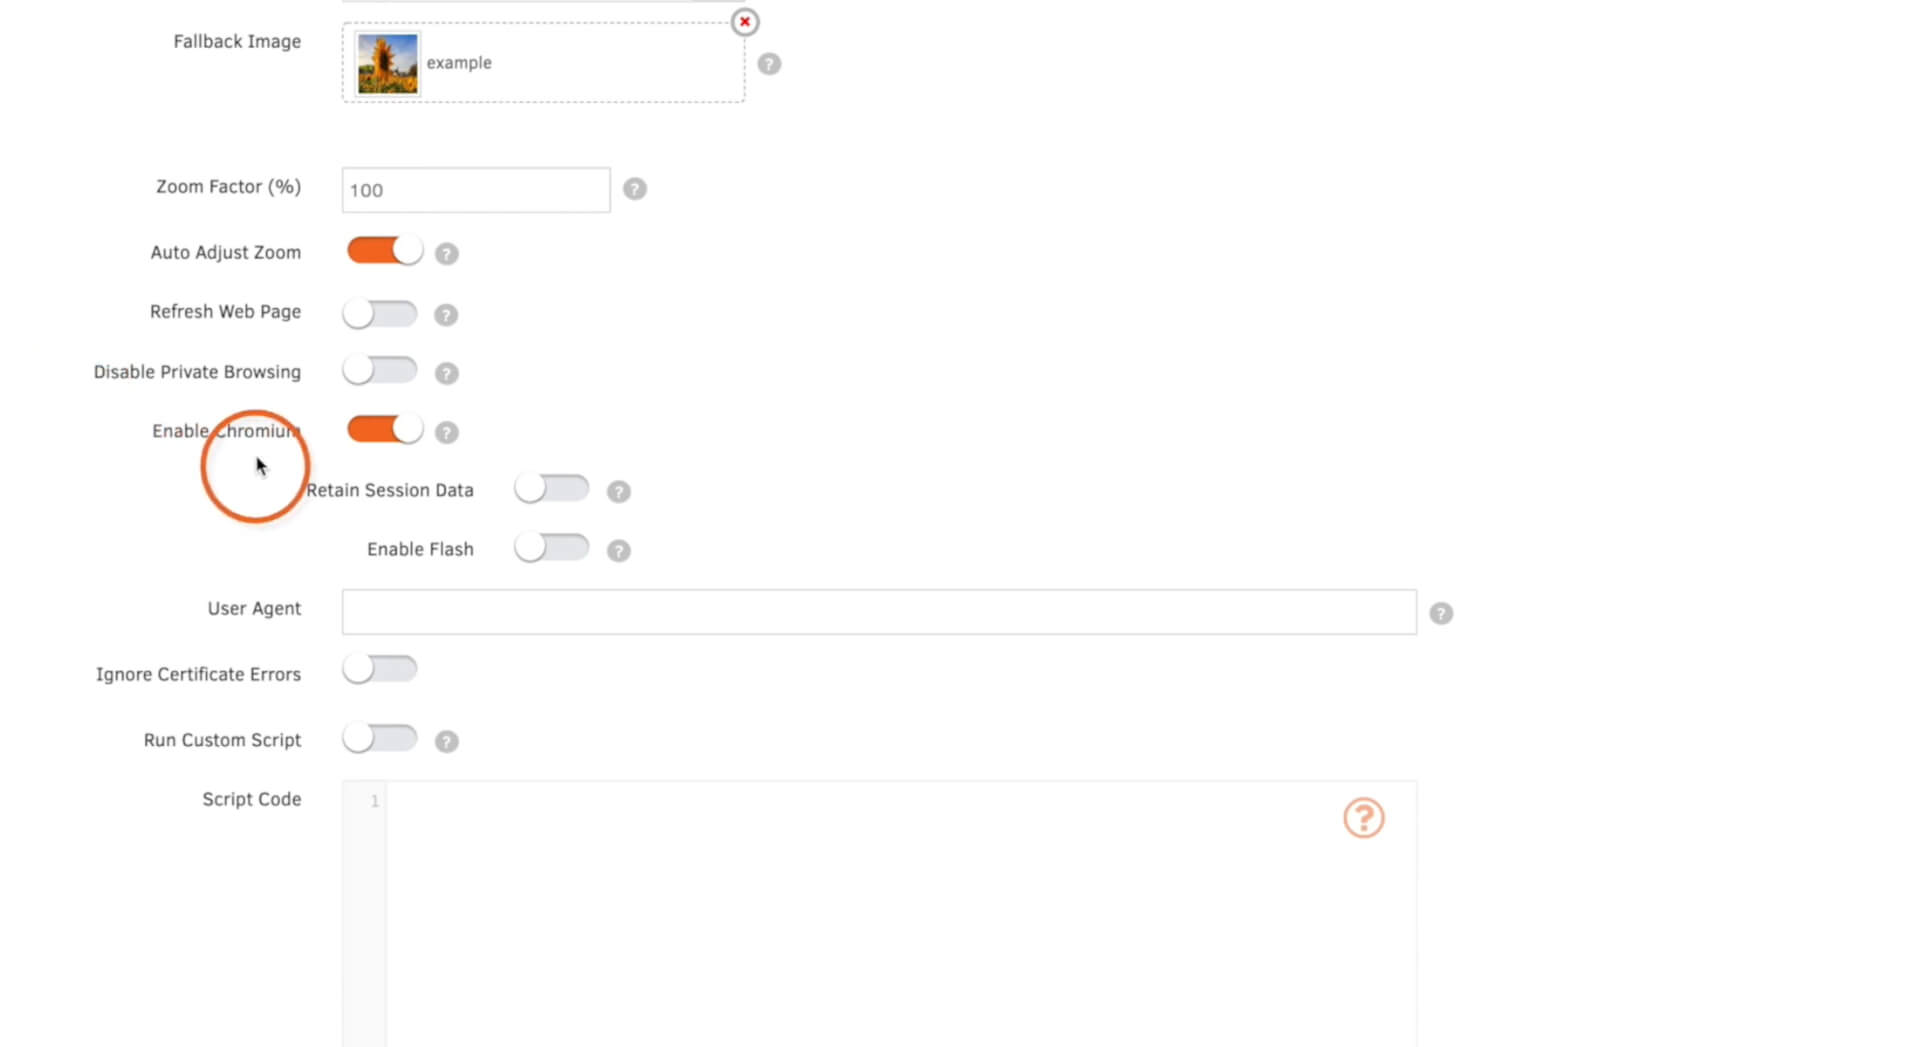
- Next, set a fallback image. This image will be displayed in the event that the web page fails to load. Having a fallback image ensures that you won’t end up with a black screen if there’s a loss of internet connection.
- The zoom factor provides the flexibility to zoom in or out of the web page when displayed on your digital signs, similar to the functionality on your computer.
- The ‘Auto adjust zoom‘ is enabled by default. This feature ensures a consistent appearance for all your web pages, regardless of the screen resolution.
- Enabling ‘Refresh web page‘ allows you to specify how often the web page will automatically refresh.
If you wish to modify any of the next advanced settings, we recommend reaching out to our support team for assistance.
- By default, web pages open in private browsing mode. If you wish, you can disable this feature by clicking on ‘Disable private browsing‘.
- ‘Enable Chromium‘ is enabled by default, and we recommend keeping this setting on. It ensures the display of web pages that may not work on the default browser, WebKit.
- The retain session data feature keeps the same login session active, even after rebooting the player. This is particularly useful if you display a webpage requiring login credentials. By retaining session data, you won’t have to log in every time. It’s important to note that Chromium must be enabled for this feature to work.
- If you intend to display a web page that requires a Flash plug-in, ensure that you enable Flash.
- If the webpage requires an older or newer user agent, locate your current user agent, copy it, and paste it into the ‘User Agent‘ box. Then, make the necessary adjustments to align it with the requirements of your specific web page.
- Enabling ‘Ignore certificate errors‘ will bypass error pages that may appear before entering a web page, allowing the page to be displayed immediately.
- To include your custom script, click ‘Run custom script‘ and input the script in the provided box. Here are some additional details on running your own script.
- Click ‘Save’, and your web page will be ready to display!

